How to Make a Beaded Ring With Wire or Elastic: Two Easy Methods
Published How we research
A beaded ring is one of the fastest jewelry projects, and there are two easy ways to make one. The elastic method threads a few beads onto stretch cord and ties it, and the wire method wraps craft wire around the finger and decorates it with beads. Both need very few supplies. This guide shows how to measure the finger, choose materials, build the ring with each method, finish the ends safely and fix common fit problems.
Products from this article
The highest-scoring picks from the buying guides this article links to. Scores are our editorial assessment, not customer ratings.
+ Stainless steel resists rust better than plain steel
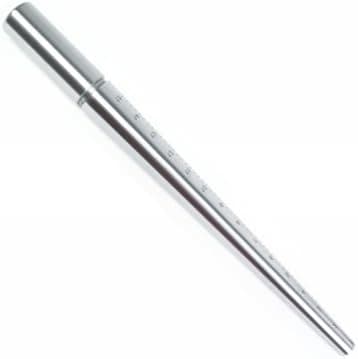
From our guide: Best Ring Mandrels for Jewelry Making
+ Five gauges cover everything from frames to fine weaving
From our guide: Best Craft Wire for Wire-Wrapped Jewelry
+ Clear 0.5mm cord disappears inside translucent and seed bead designs
From our guide: Best Elastic Cord for Stretch Bracelets
+ Ring sizer tools help make rings in the right size
From our guide: Best Ring Making Kits for Beaded and Wire Rings
Choose a method
An elastic ring is quick and forgiving. It stretches over the finger, so exact sizing matters less, and it works well for kids and for gifts. The downside is that the cord can wear out, so these rings are better for short-term wear.
A wire ring holds its shape and feels more like traditional jewelry. It requires more care because wire ends can be sharp and the ring needs to be sized more precisely. Wire rings are a good step up once you have made a few elastic ones.
Beads for rings should be small and light, because large beads can spin the ring around the finger or catch on clothing. Seed beads, tiny glass beads and small crystals work best. Think about how the ring will be worn too. A ring for everyday use should sit low and flat, while a statement ring for a party can be taller and more elaborate.
Measure the finger
Wrap a thin strip of paper or string around the base of the finger, mark where it overlaps, and measure the length. For an elastic ring, subtract about a quarter inch so it fits snugly, because the cord stretches. For a wire ring, use the measurement plus a little extra for the overlap and comfort.
Fingers swell a little in heat and shrink in cold, so measure at a moderate temperature. A ring mandrel gives consistent sizing for wire rings, and a ring sizer set takes the guesswork out of choosing a size. If you are making a ring for someone else, ask for the size of a ring they already wear.
Materials and tools
For an elastic ring, you need thin stretch cord (about 0.5 to 0.8 millimeters is common), small beads such as seed beads or tiny crystals, and scissors. A beading needle helps with small holes. For a wire ring, you need soft craft wire in a thin gauge, small beads, wire cutters and flat-nose pliers.
Wire cutters can send small snips flying, so keep your face away and consider safety glasses. A bead mat keeps small beads in place. Work in good light, and keep a small bowl nearby for extra beads.
Make an elastic ring
Cut about eight inches of stretch cord. Thread on enough beads to fit around the finger, plus a little extra so the beads are not too tight. A simple pattern of alternating colors looks neat, and a larger bead in the center makes a focal point.
Bring the two ends together and tie a surgeon's knot, pulling firmly. Repeat the knot for extra security and place a tiny dab of glue on it if you like. Let it dry, trim the ends, and tuck the knot into a bead if the hole is large enough. Stretch the ring gently to test it before wearing.
For a sturdier elastic ring, run the cord through the beads twice, so two strands of cord support the beads. Double cord resists wear better and keeps the beads from shifting. It does need beads with larger holes, so check the hole size before you start. Test the ring by stretching it gently several times before you trim the ends.
Make a wire ring
Cut about 10 to 12 inches of thin craft wire. Thread on a few beads and center them, then wrap the wire around the finger or mandrel twice so the beads sit on top. Cross the wire ends over each other and wrap each end around the ring band a few times. Press the ends flat with pliers to hide them.
Trim any extra wire and check that no sharp ends stick out. If one does, tuck it under the wraps or file it smooth. Try the ring on and adjust the fit by gently squeezing the band. Wire can harden as you bend it, so avoid reshaping too many times.
If you want the wire ring to have a smooth inside, wrap the wire neatly in parallel coils rather than crossing it. Slide the ring off the finger and look at the inside edge to check for snags. A tiny bit of filing or pressing with pliers can smooth any rough spot. Take care with wire ends, since they can scratch skin and clothing.
Finish and fit
Make sure the ring is comfortable by wearing it for a few minutes. If it pinches, loosen the band, and if it spins, make it a little smaller. Elastic rings should feel snug but not tight, and wire rings should slide over the knuckle without force.
Check for skin sensitivity. Some metals and coatings can irritate skin, so if you notice redness or itching, take the ring off and choose a different material next time. Keep rings away from small children who might put them in their mouths.
If you are making rings to sell or give as gifts, make a couple of sizes and label them. Include a small card explaining how to care for the ring, and let the recipient know that elastic rings can wear out and are easy to remake. A tidy presentation, such as a small bag or box, makes handmade rings feel special.
Design ideas and care
Try a single bead for a minimalist look, a row of seed beads for a delicate band or a cluster of beads for a statement ring. Stack several elastic rings in different colors for a playful effect. Wire rings can have curls and loops added for decoration.
Remove rings when washing dishes, swimming or doing messy work, because water and chemicals can weaken cord and tarnish wire. Store rings flat in a small box, and check knots and wraps from time to time.
Popular right now
- Seed Bead Size ChartArticle
- Choosing Beading WireArticle
- Best Jewelry Making Travel Cases for Crafting AnywhereBuying guide
- Best Bead Reamers for Enlarging and Smoothing Bead HolesBuying guide
- Best Bead Spinners for Fast Seed Bead StringingBuying guide
- Best Crimp Beads and Crimp Tubes for Secure BeadingBuying guide
Based on the last 28 days of search and visitor data.